Here’s a practical, step-by-step guide to charcoal roasting coffee at home, inspired by traditional Sumiyaki methods but adapted for safety and accessibility. This assumes small batches and hands-on control.
A Home Guide to Charcoal Roasting Coffee Beans
⚠️ Safety First (Non-Negotiable)
Charcoal roasting must be done outdoors or in a very well-ventilated open space.
- Never roast indoors (carbon monoxide risk)
- Keep water or a fire extinguisher nearby
- Wear heat-resistant gloves
- Avoid treated or instant-light charcoal
Equipment You’ll Need
Essential
- Natural hardwood charcoal
- Best: Binchotan (ideal but expensive)
- Good alternatives: oak, longan, lychee, or lump hardwood charcoal
- Charcoal grill, brazier, or hibachi
- Roasting vessel
- Perforated steel pan, wire mesh basket, or shallow cast iron pan
- Metal spatula or stirring rod
- Infrared thermometer (optional but very helpful)
- Cooling tray or metal colander
- Timer
Coffee
- Green coffee beans (start with 150–250 g / 5–9 oz)
- Medium-density beans are easiest for beginners (Brazil, Colombia, Indonesia)
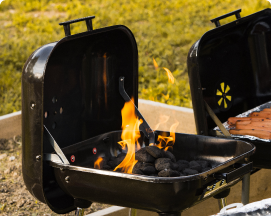
Step 1: Prepare the Charcoal Fire
- Light charcoal and allow it to burn down to glowing embers
- No flames—only steady red heat with a light ash coating
- Spread embers evenly
- Target surface heat:
- 200–230°C / 390–445°F at bean level
Charcoal roasts with radiant heat, not flame—patience here matters.
Step 2: Preheat Your Roasting Surface
- Place empty roasting pan or basket above embers for 1–2 minutes
- You want heat stabilized before adding beans
- If beans scorch instantly later, your setup is too hot
Step 3: Begin Roasting
- Add green beans in a single thin layer
- Start timer immediately
- Stir constantly—no pauses
Early Phase (0–4 minutes)
- Beans turn from green → yellow
- Grassy, hay-like aroma
- Moisture evaporates
- Keep moderate heat; don’t rush
Step 4: Control Heat Manually
Charcoal heat control is physical:
- Raise pan to reduce heat
- Lower pan to increase heat
- Fan embers gently if heat drops
- Remove excess embers if too hot
You are the thermostat.
Step 5: First Crack (≈7–10 minutes)
- Audible pops (like snapping twigs)
- Beans expand and become aromatic
- Color shifts to light brown
At this stage:
- Reduce heat slightly
- Maintain steady development
Step 6: Choose Your Roast Level
Medium Roast (Recommended for Beginners)
- 1–2 minutes after first crack ends
- Notes: chocolate, nutty, balanced smoke
- Bean temp: ~210–215°C (410–420°F)
Medium-Dark / Charcoal Style
- Approaching second crack
- Slight sheen may appear
- Notes: cocoa, caramel, subtle hearth smoke
⚠️ Avoid rushing into second crack—this is where scorching happens.
Step 7: Finish & Cool Immediately
- Dump beans into metal colander or tray
- Toss rapidly to cool
- Optional: fan beans to remove chaff
- Cooling should take under 2 minutes
Stopping heat fast preserves flavor.
Step 8: Rest (Degassing)
- Let beans rest 48–72 hours
- Store in a vented container
- Charcoal-roasted beans often peak slightly later than drum-roasted
Flavor Tips & Troubleshooting
Too Smoky?
- Embers too close
- Charcoal not fully burned down
- Flames present
Sour or Flat?
- Roast too short
- Insufficient moisture removal
- Increase time before first crack
Bitter or Ashy?
- Scorching
- Uneven stirring
- Excess heat late in roast
Best Beans for Charcoal Roasting
- Indonesia (Sumatra, Java)
- Brazil natural
- Guatemala
- Medium-density Ethiopian (for floral + smoke contrast)
Avoid very high-density beans until experienced.
Final Advice
Charcoal roasting is manual, intuitive, and unforgiving—but deeply rewarding. Expect inconsistency early on. Keep batches small, take notes, and adjust heat patiently.